

Let's Make Some No-Sew Paper Doll House CurtainsWhen you are just starting out with a dollhouse, it is hard to buy or make everything you need right away.A good solution for very inexpensive and easy to make window curtains is to create them from paper. They are very easy to make, and look quite effective in a dollhouse. |
|
|
|
|
|
|
|
The paper used for the doll house curtains on this page is ordinary computer paper. I printed the patterns on the curtains from the free printable wallpaper which you can find on my other site. www.jennifersprintables.com. You can also find nice scrapbook paper which will work just fine as well as printable wallpaper from other websites DIRECTIONS TO MAKE CURTAINS 5. Once you have both curtains pleated it is time to
glue them onto the rod. I am heavy handed with the glue for this job.
Apply a good amount of glue to the rod and simply lay the top of the
curtains onto the glued rod. If the curtain won't stay down on the rod,
lay a popsicle stick or whatever onto the curtain top then tape that
down with masking tape to your work table to hold it in place. Prop
the bottom end of the curtains up on another curtain rod so that the
curtains won't dry on an angle, we want them to hang really straight.
|
|
|
|
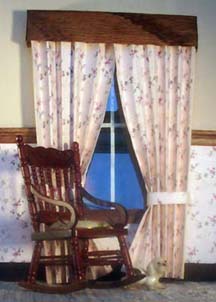
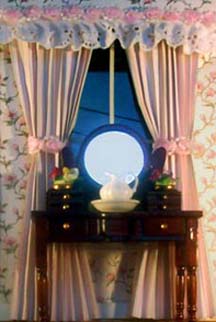
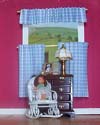
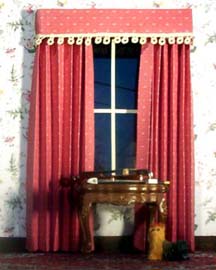 These curtains look quite formal with the matching pelmet. Adding a little bit of trim makes the pelmet look classy. They are made from ordinary computer printer paper. |
|
You may want a pelmet or window topper. You don't have to have a topper but it can give the curtains
a more finished appearance. 2. Cut out the pelmet from the card stock the size you need, just a bit wider than the window plus about an extra half inch on each end. 3. Fold each end in about half an inch. Add a tiny block of wood or a square bead to the top ends. This is so that you can glue it onto the dollhouse wall. See illustration below. 4. Reinforce the back side of the pelmet with thin wood, popsicle sticks work well. See illustration below. 5. You can now glue the curtains to the back of the pelmet. Apply lots of glue to the pelmet back and simply lay the curtains onto the glue 6. Go do something else. The glue needs a couple of hours to dry. This is the pelmet construction as seen from the back
|
|
|
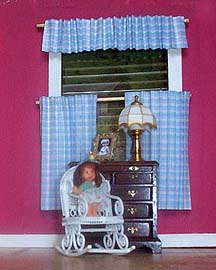
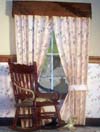
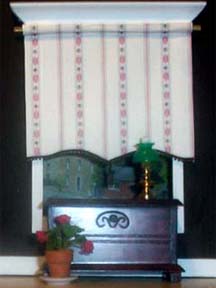
The curtains below have a window topper
or valance. |
|
|
The cafe curtains were made by making as small a pleat as I could manage. |
This valance is made from a piece of lace with a piece of decorative braid glued onto it. I tied the curtains with a piece of embroidery thread before I added the braid tie backs. |
|
|
|
Installing the Curtains |
|
|
|
|
|
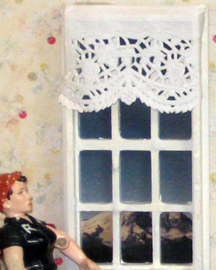
DOLL HOUSE BLINDS
|
|
 |
 |
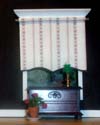
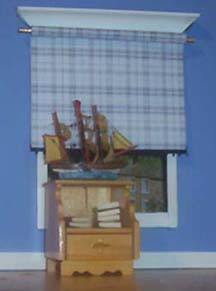
| I goofed when I made the blind above, you can see that the plaid on the
roller[ bamboo skewer ] and the plaid on the 'pulled down' blind don't line
up. I wasn't going to post it here, but you might as well learn from my
mistake so here is where I went wrong. I wanted to do a good job and thought I had it all worked out. I reasoned that the plaid pattern would have to be on both sides because when I rolled it onto the rod the back would show, I bonded one paper to the other with Heat'n Bond, but I didn't think about lining up the pattern. Duh! Yet another learning experience. |
A lot of the fun of having doll houses as a hobby is that our ingenuity is constantly being challenged. I decided to have another go at making a blind. This time I used just one layer of paper. I rolled some onto the 'roller' and made the 'pulled down' part of the blind seperately. I glued them together being careful to line up the stripes this time. This worked out much better, a fancy shape and some trim at the bottom of the blind and you can almost forget it's just made from paper. |
|
|
|
Jennifer Brooks 2003-2021 |
|---|