Let's Build a Dollhouse |
|
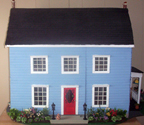
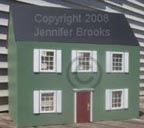
All 3 of these dollhouses are made from the same plan. The first one is stucco, which I am explaining how to do, on this page. The second dollhouse is my dollhouse, it has siding.
|
 |
 |
|
 |
|
There are many ways to finish the outside of a dollhouse. |
 |
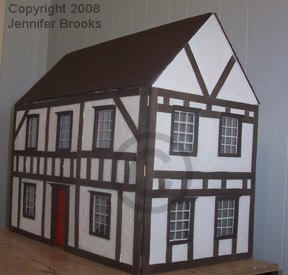
It was important not to get stucco on the parts of the house where the oak and the window frames need to be glued. For the windows I made clear plastic templates the size of the windows with frames and held them over each window when I was applying the stucco mix. The clear plastic allows you to see that you have it in the right place. Keeping the stucco from where the oak beams were to go was a bit more tedious. I taped off the design with masking tape. I wanted to get a photo of how to mask off where the 'oak beams '
will go with tape, so I was a bit hasty taking the picture. |
|
I used a mixture of ivory latex paint [left over from painting my real house] with polyfilla for the stucco. This mixture dries rock hard. I mixed the polyfilla and latex paint in an aluminum pan, which could
be thrown out later. Applied it with a sponge. It is important to pull
off the masking tape while the stucco is still wet. It is important to pull off the masking tape while the stucco is still wet. |
 |
The exterior window frames should be
applied at this point. When gluing on the window frames the
main thing is to make sure they are straight. I used Popsicle sticks for 3 sides of the window, and 1/2 inch cove molding for the top frame. After your outside window frames are glued on, fill in any gaps with pollyfilla , when that dries, sand, and touch up the paint. NOTE :The window 'glass' goes in after the interior
walls are decorated. The 'oak beams' can be glued onto the house now. This job takes patience, but it is well worth the results. |
|
If you have cut out an opening for the front door Glue the little dollhouse front door on the interior of the big door. The door can be cut out from Cutting plan 2. Place it 1/4 inch above the bottom edge of the door. Make sure this little door is glued on firmly as it will take some of the weight of the big doors. Wait until you have all the work on the interior and exterior decorating, before you put the little front door on.This includes having the door frame trim finished. You can see in the photo[left] how the bottom of the dollhouse door sits snuggly on the floor of the dollhouse when the big doors are closed. This takes some weight from the hinges, and ensures that the big door
won't start to sag over the years. Frame the interior side of the door
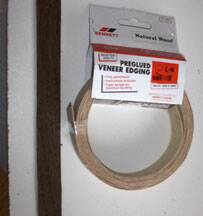
by adding some balsa wood trim . |
|


BUILD A DOLLHOUSE LINKS |
||||
| Links | ||
|---|---|---|
| Free Dollhouse Printables |
Tutorials | Dollhouses and Miniature projects. |
| Free Printable Dollhouse Wallpaper | How to make sofas andchairs from cardboard and fabric | This link will take you to Jennifer's[my] dollhouse. |
| Dollhouse Grocery Printables |
How to make dollhouse curtains from paper |
See my
hand-sculpted miniature dolls |
| How to make a realistic Ascot boiler | Visit my five miniature shops | |
| Printable Dollhouse Gift Bags and Boxes |
How to make a stained glass window from stickers and markers | Carole's first doll's house |
| Links to dollhouse building suppliers | Kerry's dollhouse | Carole's second doll's house |
Terms of use You agree not to use instructions and the images on this website for any commercial purpose, sale, resale, or compilation. |
||