Let's Build a Dollhouse |
|
|
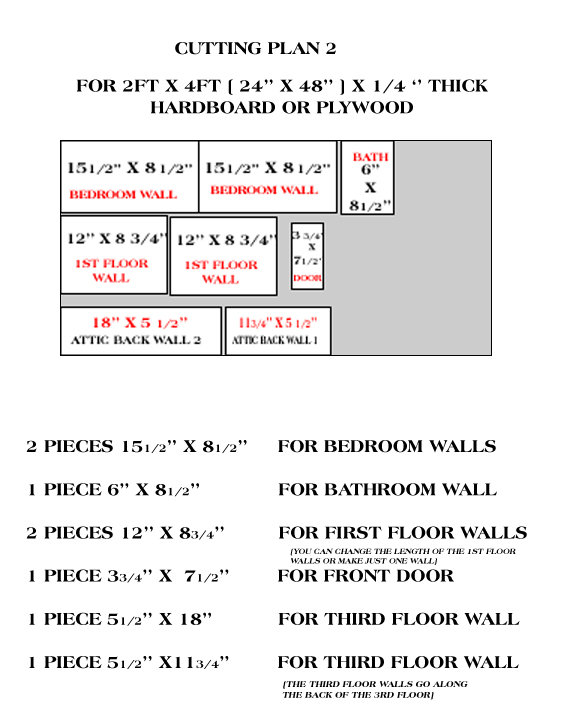
Make the appropriate adjustments on the printable cutting plan if your measurements are different. I made the main floor walls not as deep as the second floor walls. You can decide for yourself what depth you want. |
|
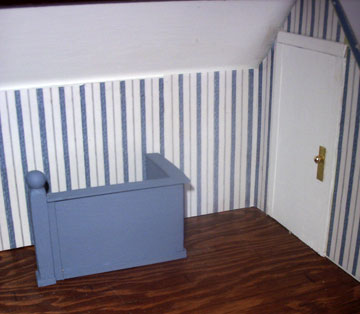
I hope you remembered to save the triangular pieces of plywood that you cut off to make the peak on the gable end. These are the perfect size for dividing walls on the third floor. Just glue two pieces together. Cut out a door from cardstock, and glue it on the wall. This will cover where the two pieces of wood join. To make an inner door, just paint the wall where the door will be,
make a frame from balsa wood, or any strips of wood. Add a 'door knob
bead'. You need to cut a notch in the top for a roof beam. |
|
These walls can be glued onto the floor and roof eaves |
|
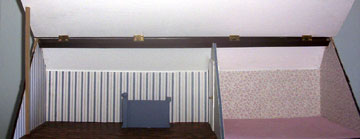
Wallpapering First draw the outline of a door on each wall, then
paint the 'door' inside the outline. Think carefully about how the walls
go into the doll house. The doors have to be seen on the bedroom walls,
the other side of the door is hidden by the back bathroom room wall. Next, wallpaper the walls. This is quite easy to do. You can paper right over the window openings, then after the paper is dry, simply cut out the window. Cut the wallpaper around where you have painted a door. I take the second floor out to make wallpapering easier. After you have wallpapered, take some narrow strips of balsa glue a frame around the door. Finally glue a piece of gold paper and a gold bead to resemble the door knob.
|
The bathroom is only 6 inches wide. The back bathroom wall sits along the edge of the stairs opening. Behind the wall is an imaginary second floor landing, which will not be seen. Be sure to put the bathroom door on the correct side
of the wall. I put the door on the wrong side, so when the imaginary dollhouse people walk out of the bathroom they face a drop to the first floor. |
 |
Do the Windows Last I use a few dots of crazy glue to secure the the clear
plastic to the dollhouse. |
THINK SQUARE |


BUILD A DOLLHOUSE LINKS |
||||
| Links to my other web sites | ||
|---|---|---|
| Free Dollhouse Printables |
Tutorials | Dollhouses and Miniature projects. |
| Free Printable Dollhouse Wallpaper | How to make sofas andchairs from cardboard and fabric | This link will take you to Jennifer's[my] dollhouse. |
| Dollhouse Grocery Printables |
How to make dollhouse curtains from paper |
See my
hand-sculpted miniature dolls |
| How to make a realistic Ascot boiler | Visit my five miniature shops | |
| Printable Dollhouse Gift Bags and Boxes |
How to make a stained glass window from stickers and markers | Carole's first doll's house |
| Links to dollhouse building suppliers | Kerry's dollhouse | Carole's second doll's house |
Terms of use You agree not to use instructions and the images on this website for any commercial purpose, sale, resale, or compilation. |
||